Import ".ovpn" configuration file to MikroTik
- Log in to MikroTik web interface and click the “WebFig” button. (1)
- In the menu on the left, select “Files”. (2)
- And in the “Upload” field, click the “Select file” button. (3)
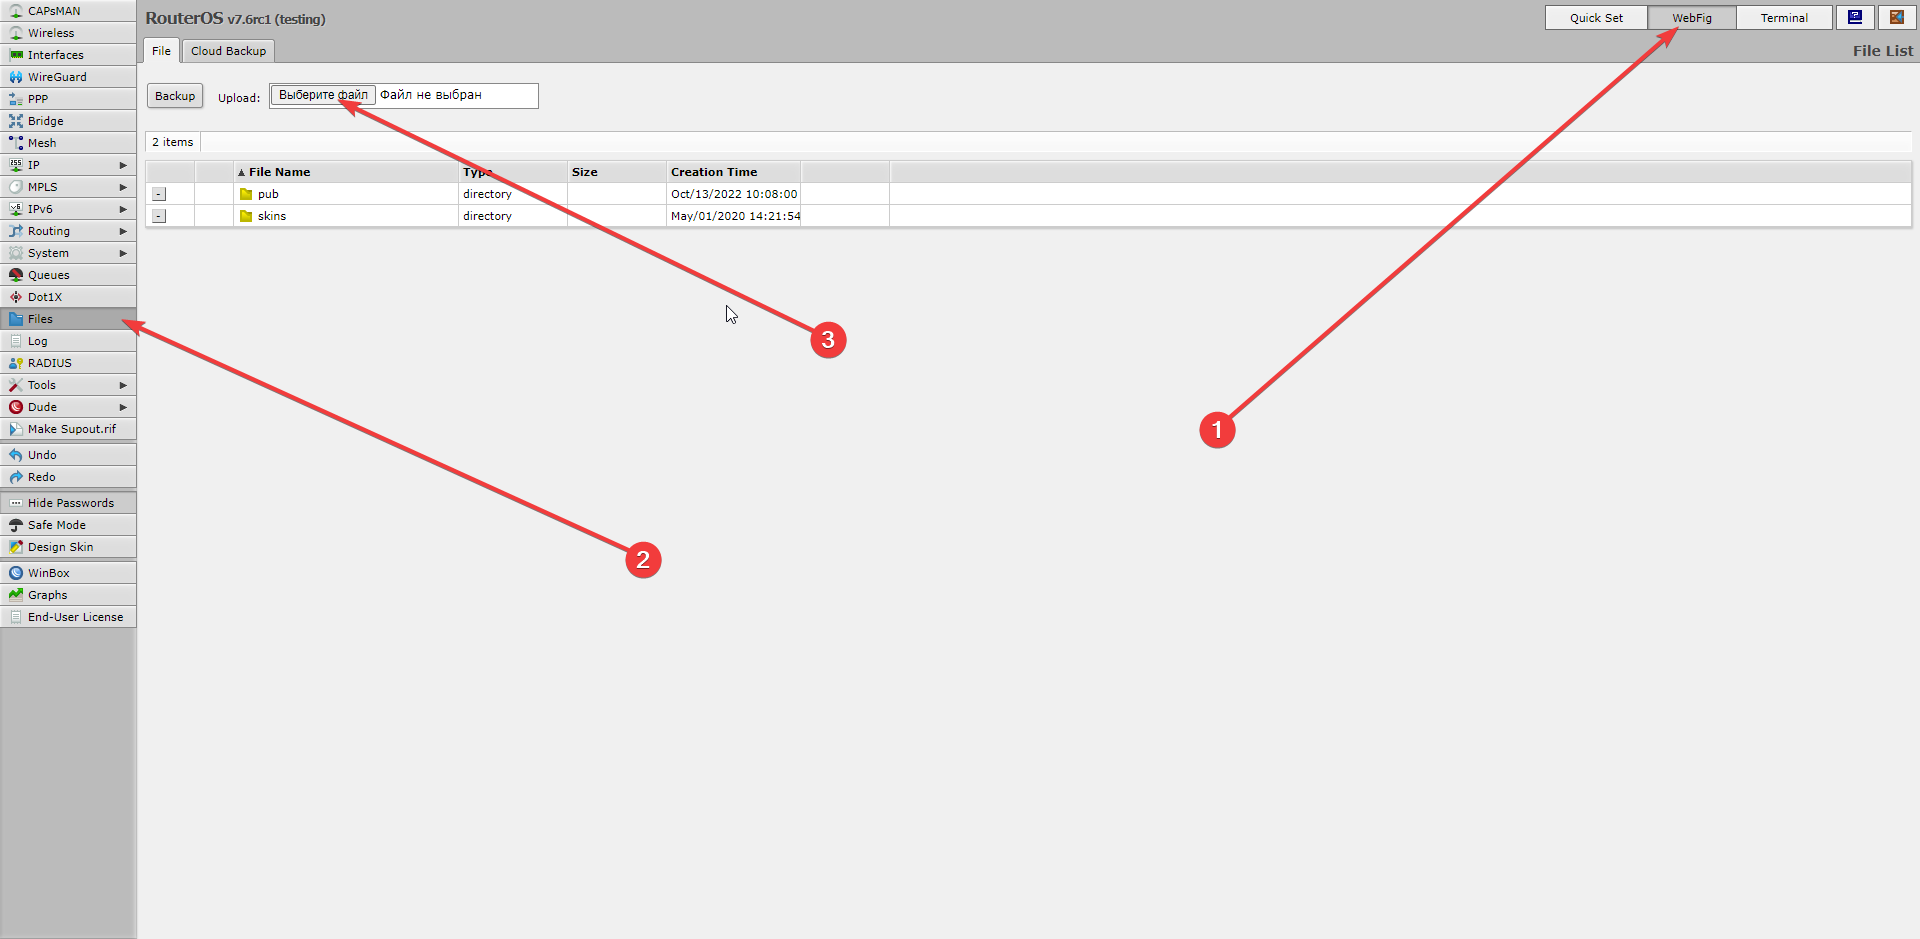
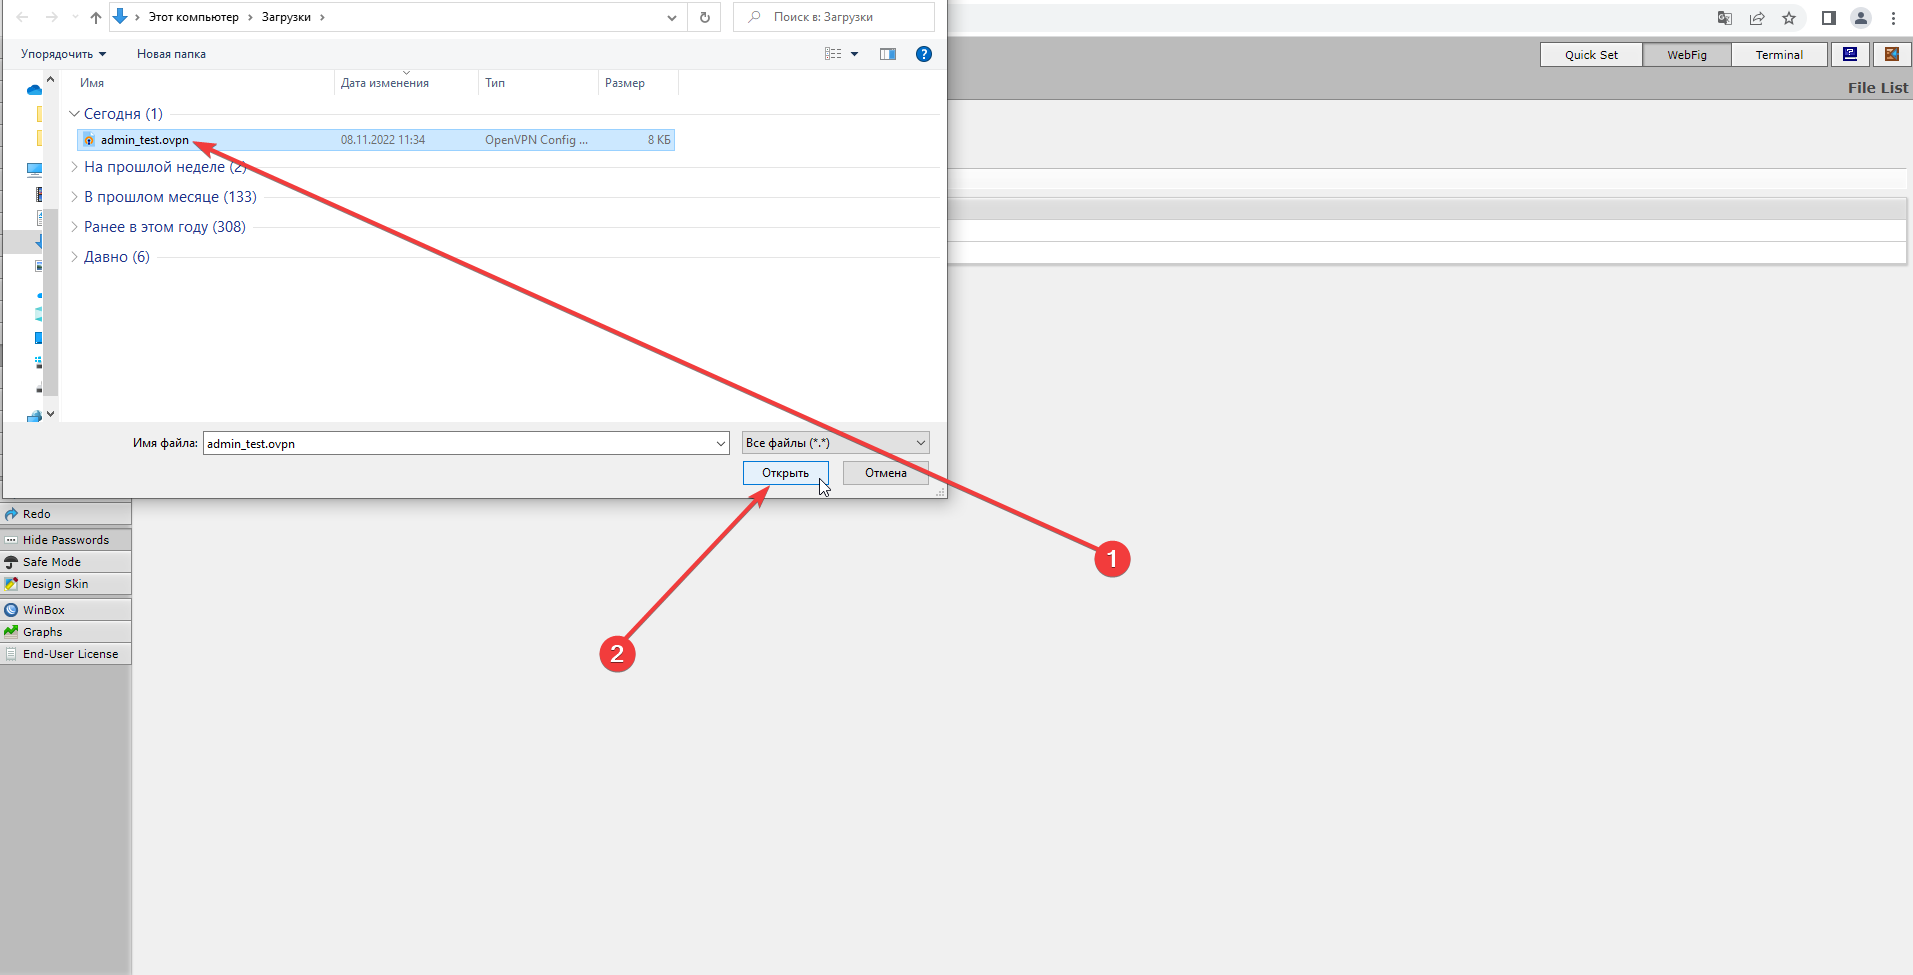
- Find the ".ovpn" file you need and upload it (1), (2).
After downloading the “.ovpn” file, you need to extract it.
-
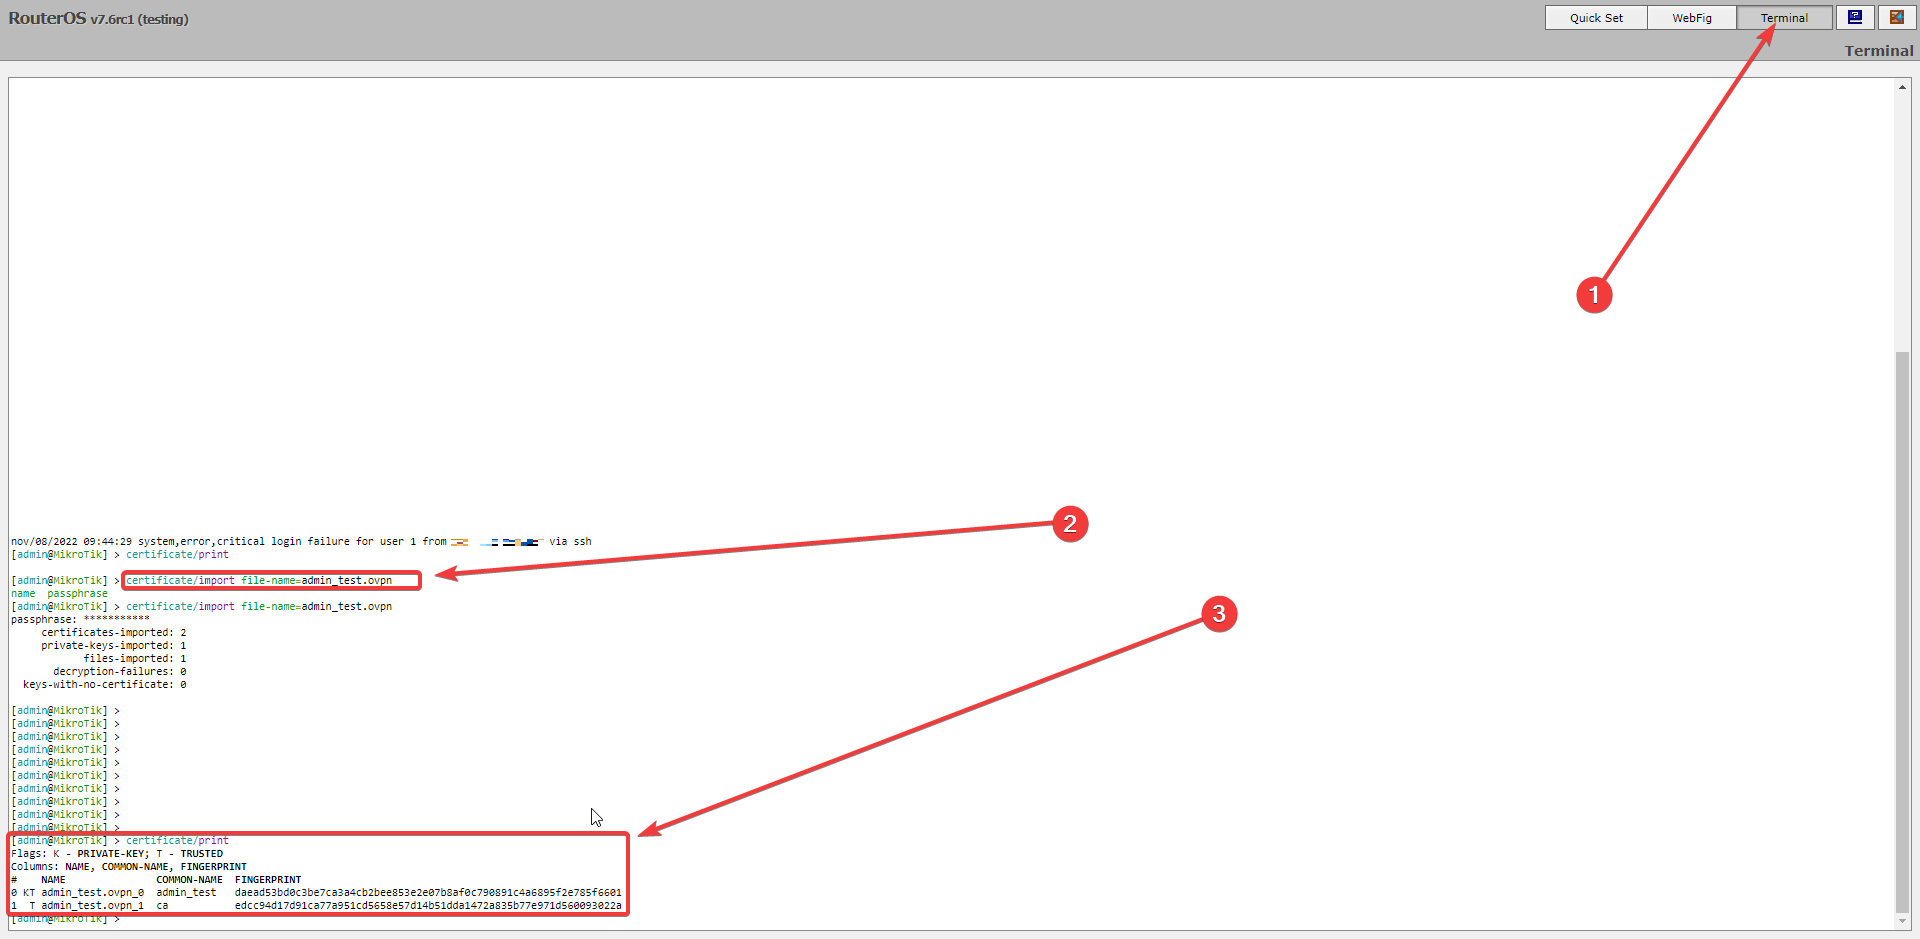
Go to the “Terminal” button (1) to open a command prompt.
-
In the command prompt, enter the following commands (2):
certificate/import file-name=$file.ovpn.
"$file.ovpn" (passphrase: *************)
-
To see the information about the imported certificates, enter the command (3)
certificate/print
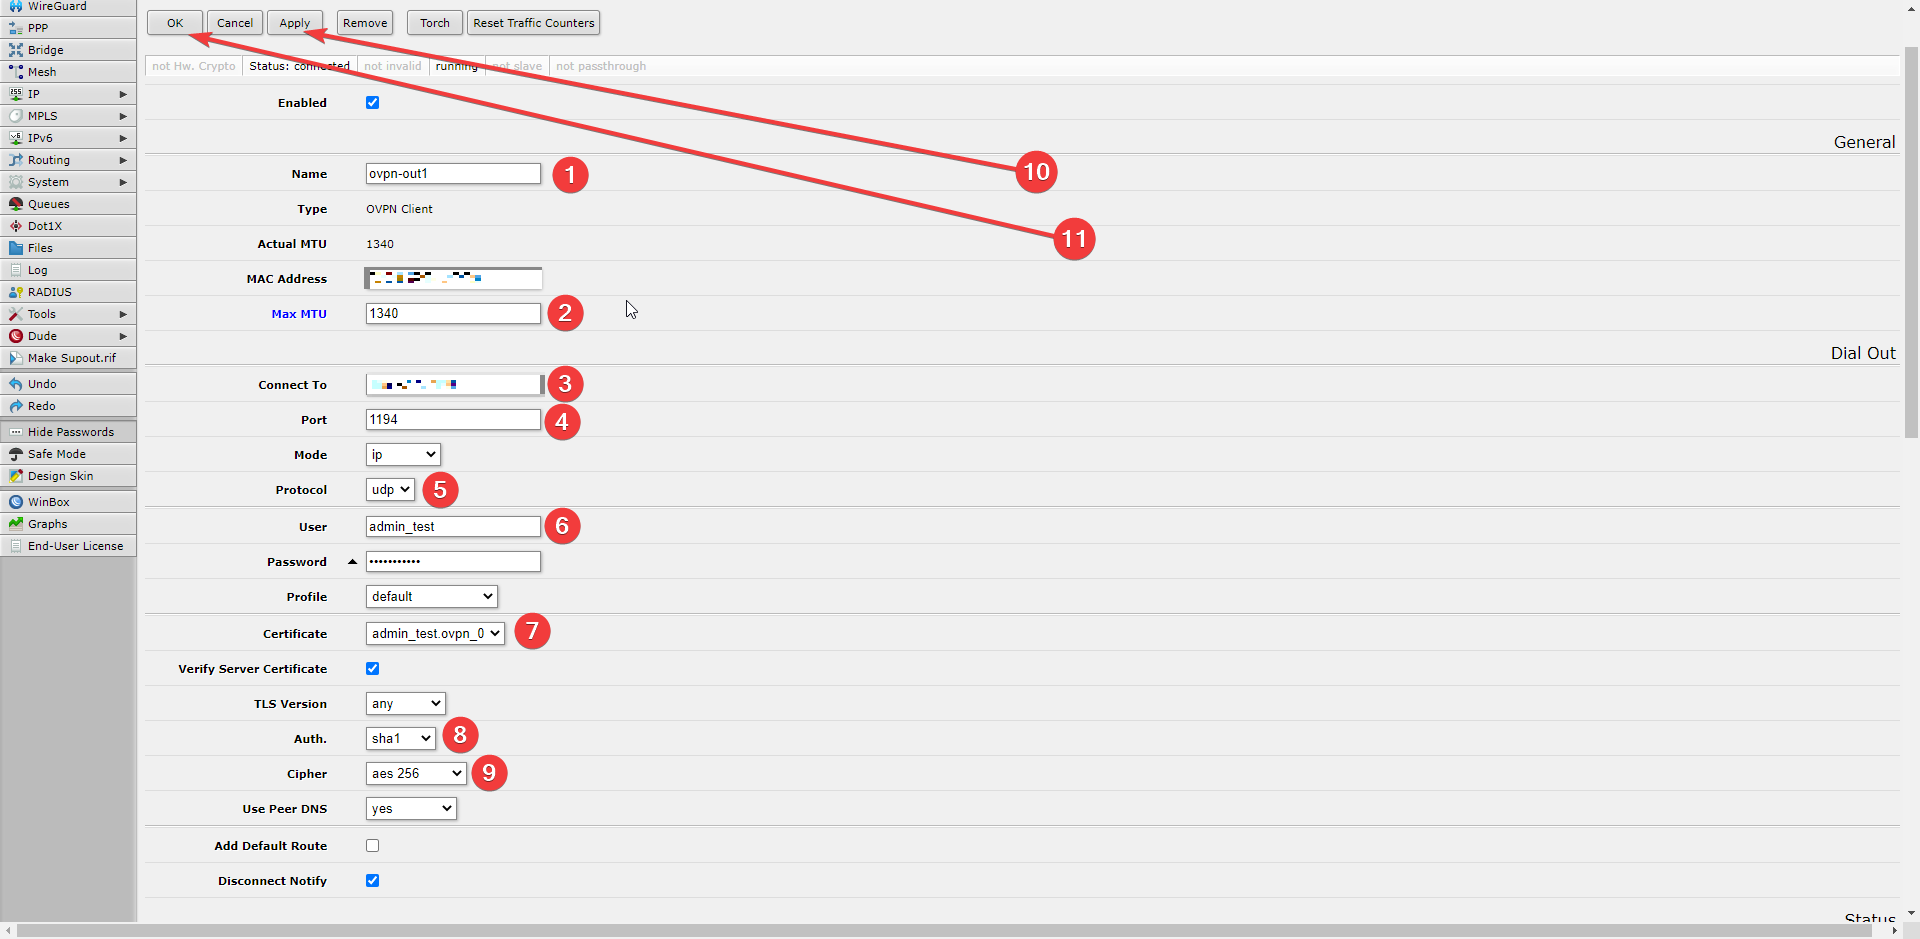
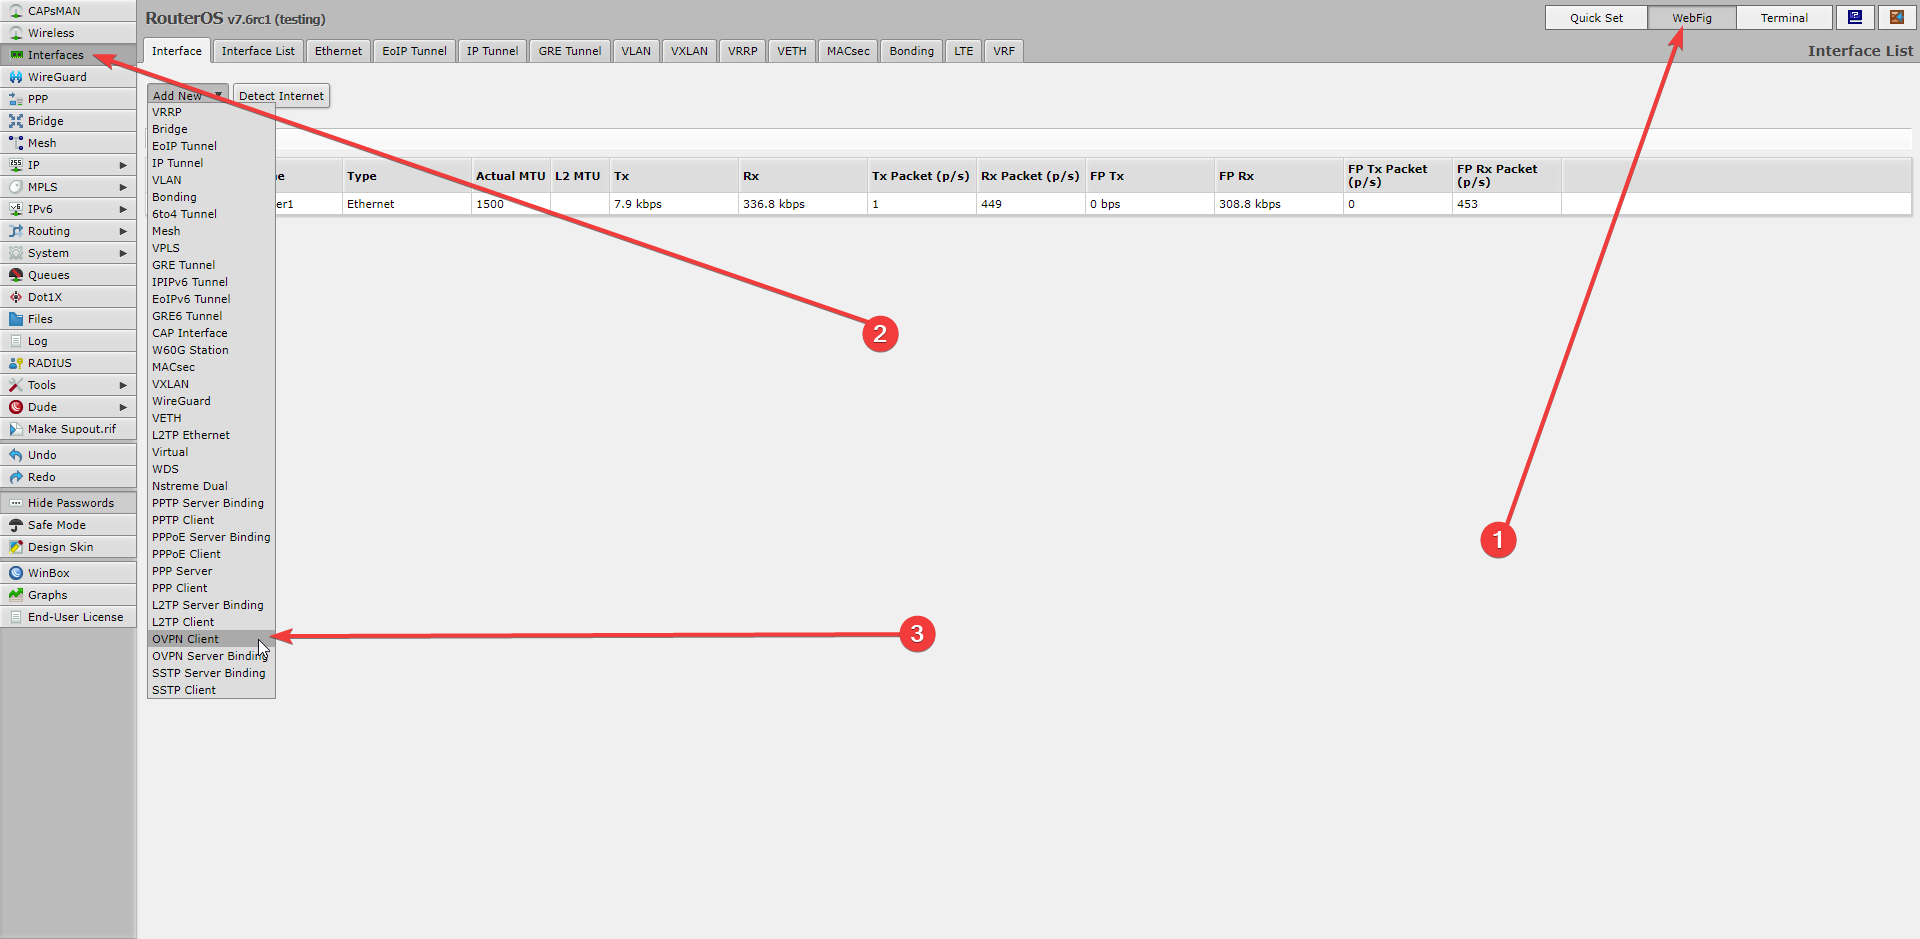
Creation of OVPN Client:
- Click on the “WebFig” button. (1).
- In the menu on the left, select “Interfaces” option. (2)
- Create an OVPN client “OVPN Client”. (3)
To connect MikroTik as an OVPN-Admin client, the following basic settings are required:
- OVPN client name, “ovpn-out1”. (individually) (1)
- Maximum MTU, “1340”. (individually) (2)
- Remote IP address of the OVPN-Admin server. (individually) (3)
- OVPN-Admin server port, “1194” (4)
- The protocol that the VPN will work with is “udp”. (5)
- Username, “admin_test”. (individually) (6)
- User certificate, “admin_test.ovpn_0”. (individually) (7)
- Authorization, “sha1” (8)
- Cipher-VPN, “aes 256” (9)
- Click the “Apply” button (10) to apply the settings and click the Ok button (11) to save the changes. Then check the status.